1. Choose a photo
Open TimeFix and choose a photo from your album. If a date is already printed on it, use the original without that date if available. Adding a new watermark will not erase the old one.
2. Choose a date and time watermark
Choose a watermark that shows the date and time. Make sure it does not cover the part of the photo you need to show.
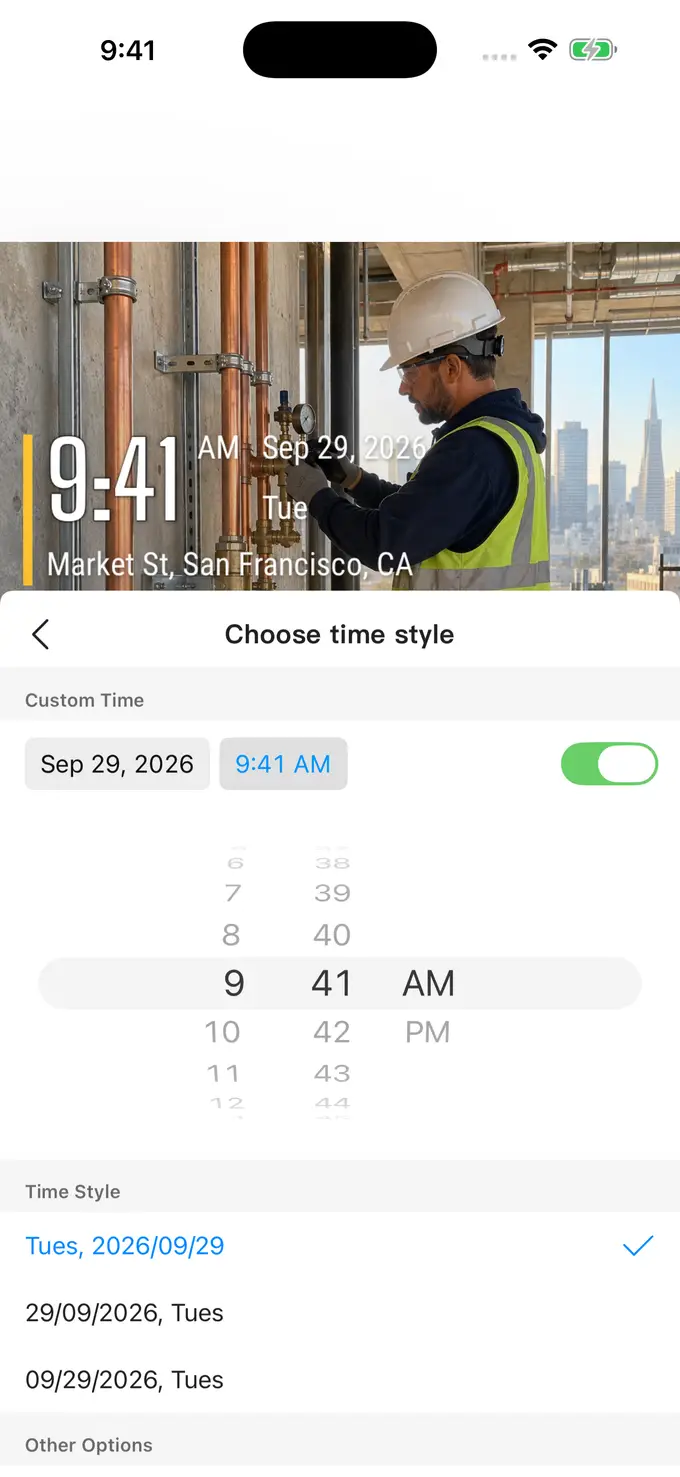
3. Set the date and time
Open the time setting and choose the date and time to show. Check the year, month, day and time. For an older photo, check when it was taken before filling this in.
4. Check the watermark
Check that the date and time are easy to read. Check the other text too. Make sure the watermark does not cover important parts of the photo.
5. Save and review
Save the photo, then open it in your album to check it. Keep a separate original if you need it later. Some watermarks and editing tools need a paid VIP plan.
Good to know
Is a visible timestamp the same as EXIF data?
No. A watermark is text you can see on the photo. EXIF is information stored inside the photo file. These steps only change the visible watermark.
Can I do this in a web browser?
This workflow uses the TimeFix app on iOS or Android. The website provides guides and download links.